MLZ is a cooperation between:
 > Technische Universität München
 > Helmholtz-Zentrum Hereon
 > Forschungszentrum Jülich
MLZ is a member of:
 > LENS
 > ERF-AISBL
MLZ on social media:

MLZ (eng)
Lichtenbergstr.1
85748 Garching
18.03.19
An elevator with millimeter precision – How to lift a 20-meter long pipe
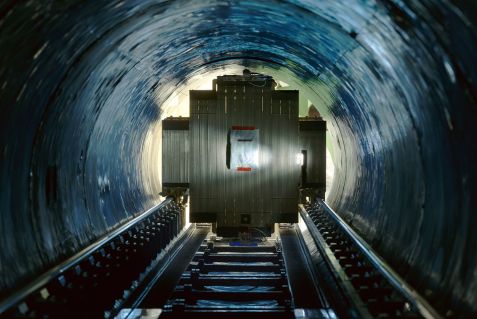
The detector within the small angle neutron scattering instrument can be moved back and forth. © W. Schürmann / TU München
There is a lot of excitement in the neutron guide hall. The instrument KWS-2, which weighs about 5 tons, is about to be lifted up. It is a Herculean task to move this colossal stainless steel pipe, not only because of its weight but rather due to the coordination needed to do it. By around 10 o’clock in the morning about half of the task was done. “Everything is going as planned and we are probably going to finish today”, says Simon Staringer. He is an engineer at the Forschungszentrum Jülich and, together with his colleague Kendal Bingöl, responsible for the lifting of the pipe.
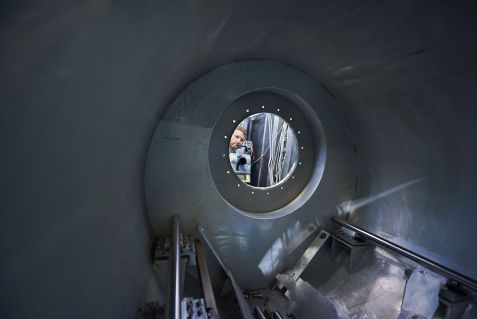
Engineer Simon Staringer takes a checking look into the detector tube of KWS-2. © W. Schürmann / TU München
Twenty five times higher performance
But let’s start from the beginning. One component of the instrument KWS-2 at the Heinz Maier-Leibnitz Zentrum is a 22-meter-long pipe with a diameter of 1.4 meters. Inside, a detector can move in the range of one and 20 meters behind a probe to measure the small angle scattering of various materials. In 2015 it had been equipped with a new detector, which is capable of measurements with a performance up to 25 times higher than its predecessor. The only problem was that the scientists were not able to use this increased efficiency optimally, because the neutron beam did not hit the new detector in the center. As a result, the measurements were cut off at the top edge at small distances from the probe. The detector uses all the cross-sectional area so an adjustment in the interior was not possible. So, what could one do? The only option left was moving the whole pipe to the required position, which is ten centimeters above the current one.
Dr. Aurel Radulescu, one of the two instrument scientists, explains all this while his instrument behind him moves upwards gradually. He came together with his colleagues to watch the pipe’s journey. Actually, journey is not very suitable because no movement is visible. But one can hear the hydraulic lifts loud and clear. Dr. Radulescu is standing at a bit of a distance so he does not disturb the work of Simon Staringer and Kendal Bingöl.
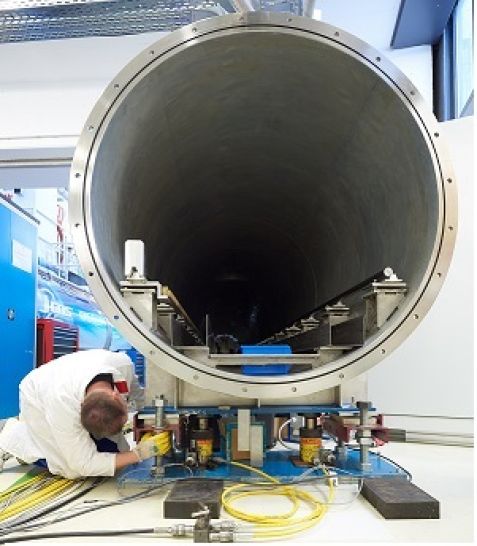
The hydraulic lifts (yellow cylinders) are positioned underneath the pipe. Sixteen of them are lifting the whole instrument. © W. Schürmann / TU München
Normally, this company lifts bridges or buildings – this time: a scientific instrument
For the lifting, they hired external professionals and they decided that the company A&K Hebetechnik from Berlin should take over. Normally this company lifts bridges or buildings but they are capable of coping with this task as well. Sixteen hydraulic lifts are positioned under the pipe. With an elaborated valve control system and a computer-controlled displacement measurement system they are about to lift the experiment millimeter by millimeter. But why this much effort? “The whole lifting process has to happen synchronously otherwise it could bend. This would lead to a misalignment of the rail system and an ullage of the facility”, explains Kendal Bingöl. “Exactly”, adds Simon Staringer and turns his eyes nervously form the pipe to the lift control and back. “The instrument has to be evacuated during a measurement. One hairline crack in a weld or a damaged sealing would lead to a long breakdown of the experiment.” No wonder there is this much excitement in the air.
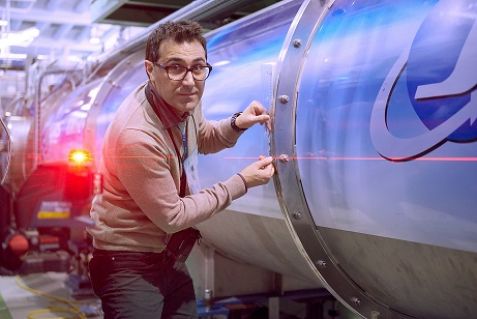
Engineer Kendal Bingöl checks the position of the detector tube of KWS-2 with the help of a laser. © W. Schürmann / TU München
However, this excitement does not affect the guys from A&K Hebetechnik and so the pipe reaches its destination safely.
The relief is even greater when the position of the tube is measured at the end. The two ends are only apart by two millimeters, which lies in the acceptable range. “We can correct those differences tomorrow by hand. We just have to adjust the nuts”, announces Simon Staringer. This is also the sign for withdrawal. After the group picture, the neutron guide hall slowly empties, as everybody leaves.
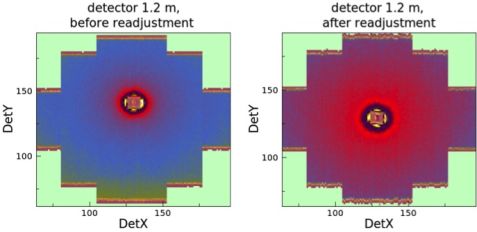
The comparison measurements before (left) and after the lifting (right) shows its success: The green area in the lower part of the left picture is the sector of the detector, which was not reached by the neutrons. This area is gone after the lifting. © A. Radulescu / Forschungszentrum Jülich
“Seems like everything worked out in the end. But we can only be certain that the neutron beam hits the detector in the right way when the neutron source is operative again”, says Simon Staringer whilst leaving the hall.
Ultimately and fortunately soon after the opening of the neutron beam for the next cycle it was clear, that the lifting was a success. The beam is now hitting the detector in the middle and Dr. Aurel Radulescu and his colleagues can use the full potential of their detector.
MLZ is a cooperation between:
 > Technische Universität München
 > Helmholtz-Zentrum Hereon
 > Forschungszentrum Jülich
MLZ is a member of:
 > LENS
 > ERF-AISBL
MLZ on social media:


